Do It Yourself – Website Tutorials
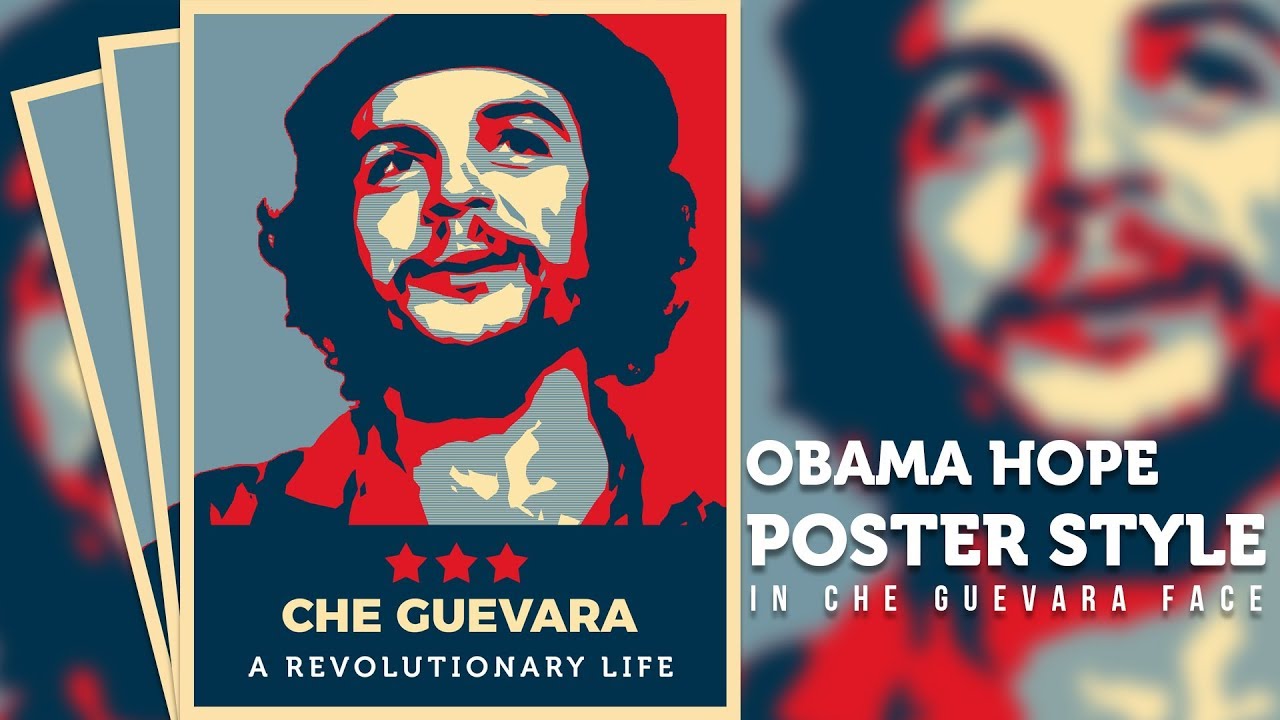
Obama hope poster was designed by (Shepard Fairey) which was widely described as iconic and came to represent his 2008 presidential campaign. In this Tutorial, I am gonna show you
How to make this (hope) Poster using Adobe Photoshop cc 2018.
First, open your photoshop and Create a new Document, Here I am using 1400px width and 1800px hight with 300 Resolution and RGB color. Now I am gonna make a background for this design. Before creating this Background then you must be check Rulers and snap is checked or not. If this not then please check Go to view and see. Now drag the ruler in your document center then select the rectangle marquee tools and select the foreground color and choose the color B:50% and hit ok. Now select the document and Hold (alt) key and (DEL) key. And Do the same thing again but The color is B:25%. My background is done.
Now Open your Image and remove the background and Drag your image into the main document. Now Hold (ctrl)+(T) for free transform and Hold (shift)+(alt) key for setting your image. Now select your image and Go to Filter-Blur-surface Blur
The setting is (Radius 10px) and (levels 10). Now Create some color Effect.
Go to Adjustment-Channel Mixer and check the monochrome. again go to adjustment-posterize and level is 5. Because here I need to use 5 colors for this design. Finally, Go to Adjustment-Gradient Map and click, then open a new window. Here I am gonna create 5 colors that I already told you. The color setting is Color 1st: 00324D 2nd:E01825 location:25% 3rd:7498A4 location:50% 4th:FDE5A9 location:75% 5th:FDE5A9 location:100%. Ok, it’s done.
Now Hold Shift Key and Select the All Adjustment layer and again hold (ctrl)+(G) for make a folder. The Folder Name is Adjustment. Now Turn off this Folder eye.
Select The Image layer and Go to Filer-Filter Gallery-Artistic Folder and choose the cutout filter. Filter setting is 5/5/1. Ok Now select the magic wand tool and click the image second color and go to (select-Save selection). You can find the selection of channels. If you don’t see the channel then go to the window and check the channel.
Now create a new layer and go to foreground color and the color is B:50% then go to Filter-Filter gallery-sketch folder- halftone pattern. The pattern setting is 1/50 and the pattern type is line and hit ok. Now go to the channel and Hold (ctrl or CMD) and click the alpha then your selection is visible now. Then select the layer and create the layer mask. Now turn one the Adjustment folder eyer and you can see the magic.
Now create some text and frame. HAve fun
Hope you enjoy this video. Please subscribe MHDesign youtube channel for more amazing video tutorials.
https://goo.gl/twfe6c
For More Videos
——————————-
https://goo.gl/JPm6iv
Download The PSD Template
—————————————————
https://mhdesign.club/obama-hope-poster-design/
Find me on
————————-
Facebook: https://www.facebook.com/Official.MHD…
Twitter: https://twitter.com/mhdesign47
Linkedin: https://www.linkedin.com/in/mehedi-ha…
Pinterest: https://www.pinterest.com/creativeide…
Deviantart: https://mhdesign94.deviantart.com/
Website: http://www.mhdesign.club
source

