Create a Membership Website with WordPress – S2Member Plugin Installation
Download Link to the Free Framework version used in the series.
This video covers the installation of the S2Member Framework and the WP Show IDs plugin that we need for the creation of the membership site. We’ll be installing other plugins later to enhance the site, like a Tables plugin, and JW Player for Flash & HTML5. I addition we’ll also install BackWPup Free version and WordPress SEO by Yoast. These are not directly related to a membership site but are important to have regardless what type of site you operate.
All these plugins are installed like any other plugin in WordPress.
Navigate to Add New Plugins and enter WP Show Ids. Locate the WP Show Ids plugin by WebSharks and click the install now link and OK to start the install process. Click Activate on the success screen. This plugin makes finding the Ids for a page or post easy. It creates a new ID column in the All Pages and All Post tables. This information is needed when setting restrictions for site content.
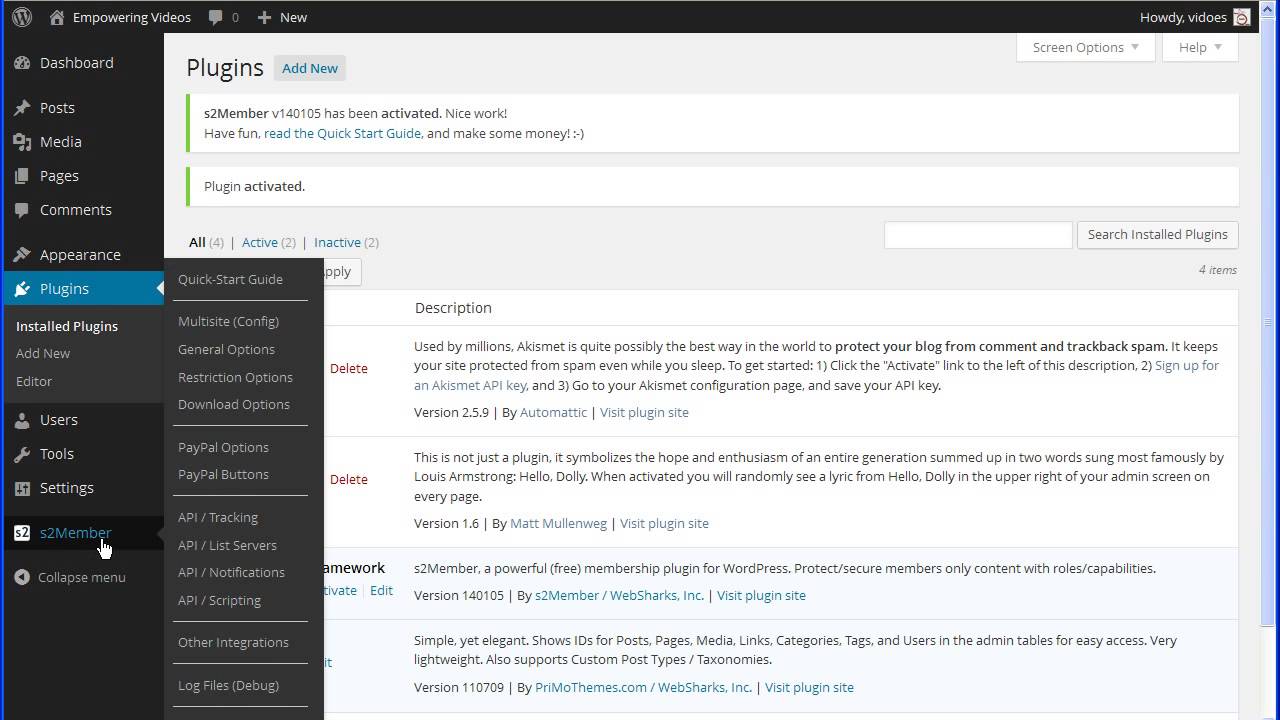
Navigate back to the Add New Plugins screen to install the S2Members Framework plugin. Enter S2Member in the search box and click the Search Button. Locate the S2Members Framework Plugin by WebSharks and click the install button and OK to start the process. Click activate on the success screen. This will install a new admin panel for s2Member with a list of management options.
S2Member is a WordPress membership management plugin that’s used to protect site content and allow members to view only designated content. S2Member has a free version and a paid Pro version. The course covers the free Framework version. With a fresh install of WordPress the permalinks settings and the general settings should be set before continuing. If you have not made these settings then you should set the date and time and the permalinks before you continue. These settings are covered in another video.
S2Member operates by directing visitors trying to view members only content to a membership options page. This page is where the PayPal buttons are placed to purchase a membership. Once a purchase has been completed they’re directed back to the site to create a username and password on the registration screen.
They will then be directed to the Welcome page. The Welcome page is the first page a visitor sees after logging in as a member. This page usually has a Welcome message and information about using the site.
We need to create the Membership Options page and the Welcome page before we continue. These are required pages for S2Members and they can left blank for now. We’ll design these pages and the login screen once we’ve configured some other options.
Navigate to the Add New Pages screen, enter Welcome Page in the Title field and click publish. This will be the first page a registered member will see after login. Now Click the add new page button again and enter Membership Options Page in the title field and click publish. This will be the page that a non-register used will see. It will contain the membership options and the PayPal buttons for purchase of membership options.
Now to make the process easier and so we’ll not get the warning banners, we need to set the Membership Options Page and the Welcome Page.
Navigate to S2Member General Options and open the Login Welcome Page by clicking on the bar.
Select the blank Welcome Page we just created from the drop-down.
Now navigate to the S2Members Memberships Options Page and open it by clicking the bar. Select the blank Membership Options Page we just created from the drop-down.
Now click the Save All Changes Button at the bottom of the screen.
We now have WP Show Ids, the S2Members plugin installed and the required pages created and set.
source

