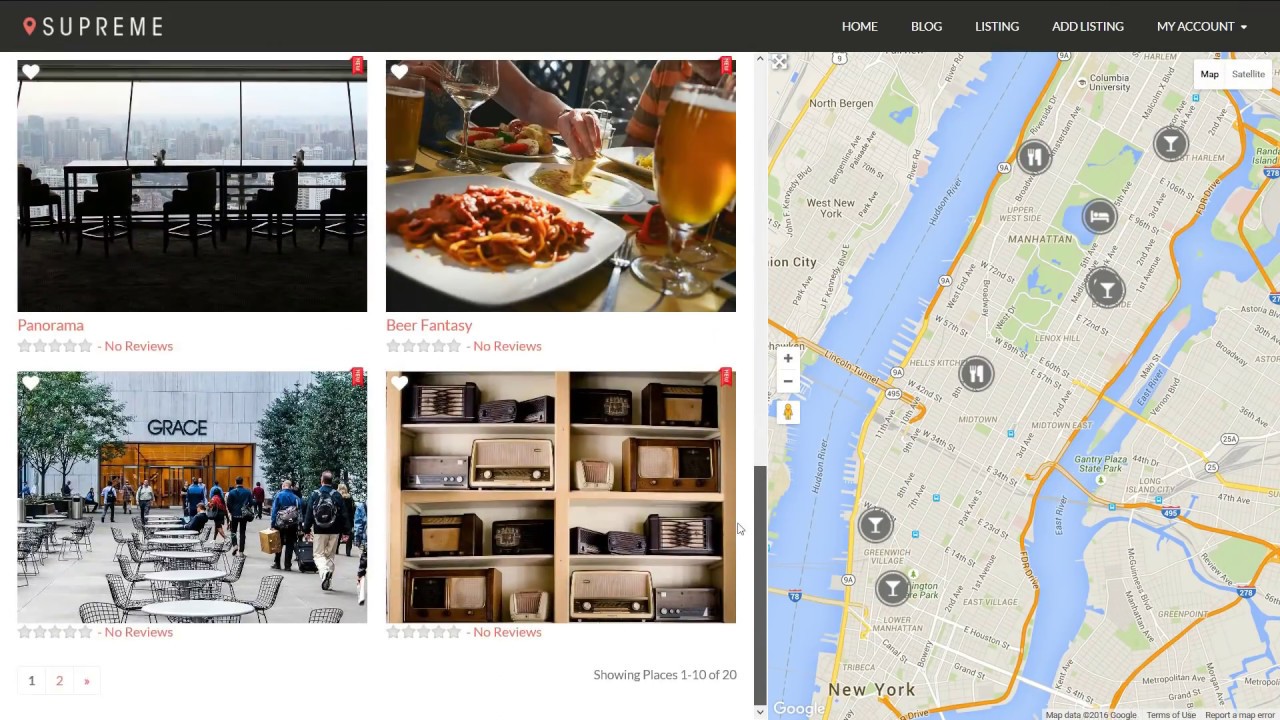
Check how easy it is to create a free city website with our WordPress Directory Theme and Plugins.
In this Video we show how to build a City Directory Website, with a free WordPress Plugin. Where users can register and login. They can submit listings from a front-end form. Where listings can be search near a zip code or street address and results are returned ordered by proximity. Finally, where users can review listings.
Assuming you already have WordPress installed, from the dashboard hover Plugins and click on add new. In the search plugin form, type GeoDirectory and hit enter. Install the GeoDirectory plugin, by clicking on the Install Now button and activate the plugin.
Finally we need a Google Maps API key, creating it is very simple, here is a link to a tutorial about it:
For this demo we created an API key in advance, that we will copy and paste in the required field. Now GeoDirectory is installed and you can set the default location for your free city directory. In this tutorial we will use New York City.
For GeoDirectory to work correctly, we still need to change the default permalinks. We suggest to use the post name option.
Now you can import the dummy data and get some examples to work on, or import your final categories and listings through our CSV file import option. In this demo we’ll show you how to import via CSV file.
To do this, we need a CSV file for our categories and one for the listings. The sample file can be downloaded from the import and export options page. We will also need images for the listings and map icons for the categories.
Following is a link to the documentation for Import and Export options
Let’s proceed with the import. 1st of all, we must import categories. Once the import is completed, the system will tell you where to upload the image files, make sure to take note of the folder path.
Now we can import the listings too. After the import is completed, the system will tell you where to upload the image files, it should be the same folder previously noted down, but you should always double check.
It’s time to import the map icons for the categories and images for the listings. We’ll do that using a FTP client and we need to upload them on to the folder previously noted.
Now we can see our categories with icons. And our listings, with images. Finally we can install the Supreme Directory Child Theme, but first we need to install our free Directory Starter, the parent theme.
Install it, but don’t activate it. Click on return to theme installer.
Next we need to install the Supreme Directory Child theme, you can download it for free from the GeoDirectory official website.
Click on Upload Theme, Then Browse and select the zip file from your desktop. Click Install Now and finally Activate it.
We are almost done. We still need to add the Directory links to the main navigation. This is done via : GeoDirectory, Design, Navigation and selecting the menu location where we want to add the links. The links are now visible n the menu.
The Home Page content below the featured image, can be edited with your favorite page builder. We used Beaver builder lite for our demo and you can see how its back-end looks like. It’s super easy to get the job done.
Search results and listings pages are already setup and so are the listing details pages. That’s about it. Features are endless and you can extend GeoDirectory with several premium add-ons.
Like the Location Manager to extend the directory beyond the default location.
Or the Payment Manager that allows to collect Payments for featured listings.
If you have any question, don’t hesitate to contact the GeoDirectory Team.
We hope you enjoyed this tutorial, thanks for reading!
Music:
source

